Write & Remove Data
You can use Manychat's native Google Sheets integration with Botsheets to write, edit, and delete data.
Provide Edit Access To Sheets
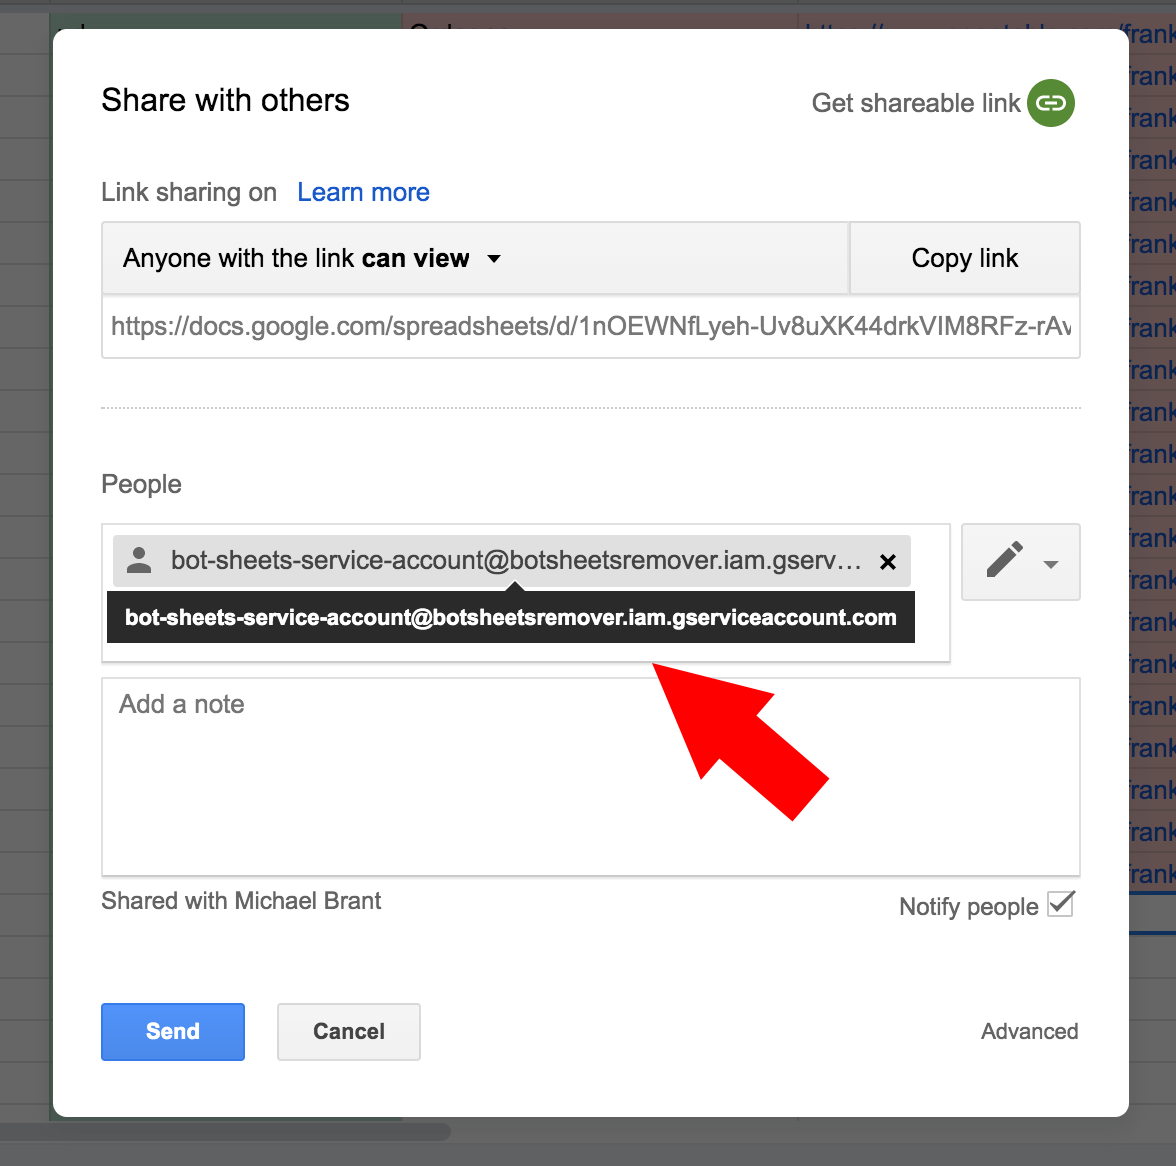
In order for Botsheets to edit content in your Google Sheet cells, you'll need to provide additional sharing access to your templates. You'll need to click the share button (top right corner of your Google Sheet) and add the following email address:
bot-sheets-service-account@botsheetsremover.iam.gserviceaccount.com
This email address will give Botsheets permission to edit cells and delete rows from your Google Sheet. Follow this as a guideline for sharing your Google Sheet with Botsheets.
Writing data to a gallery format Google Sheet
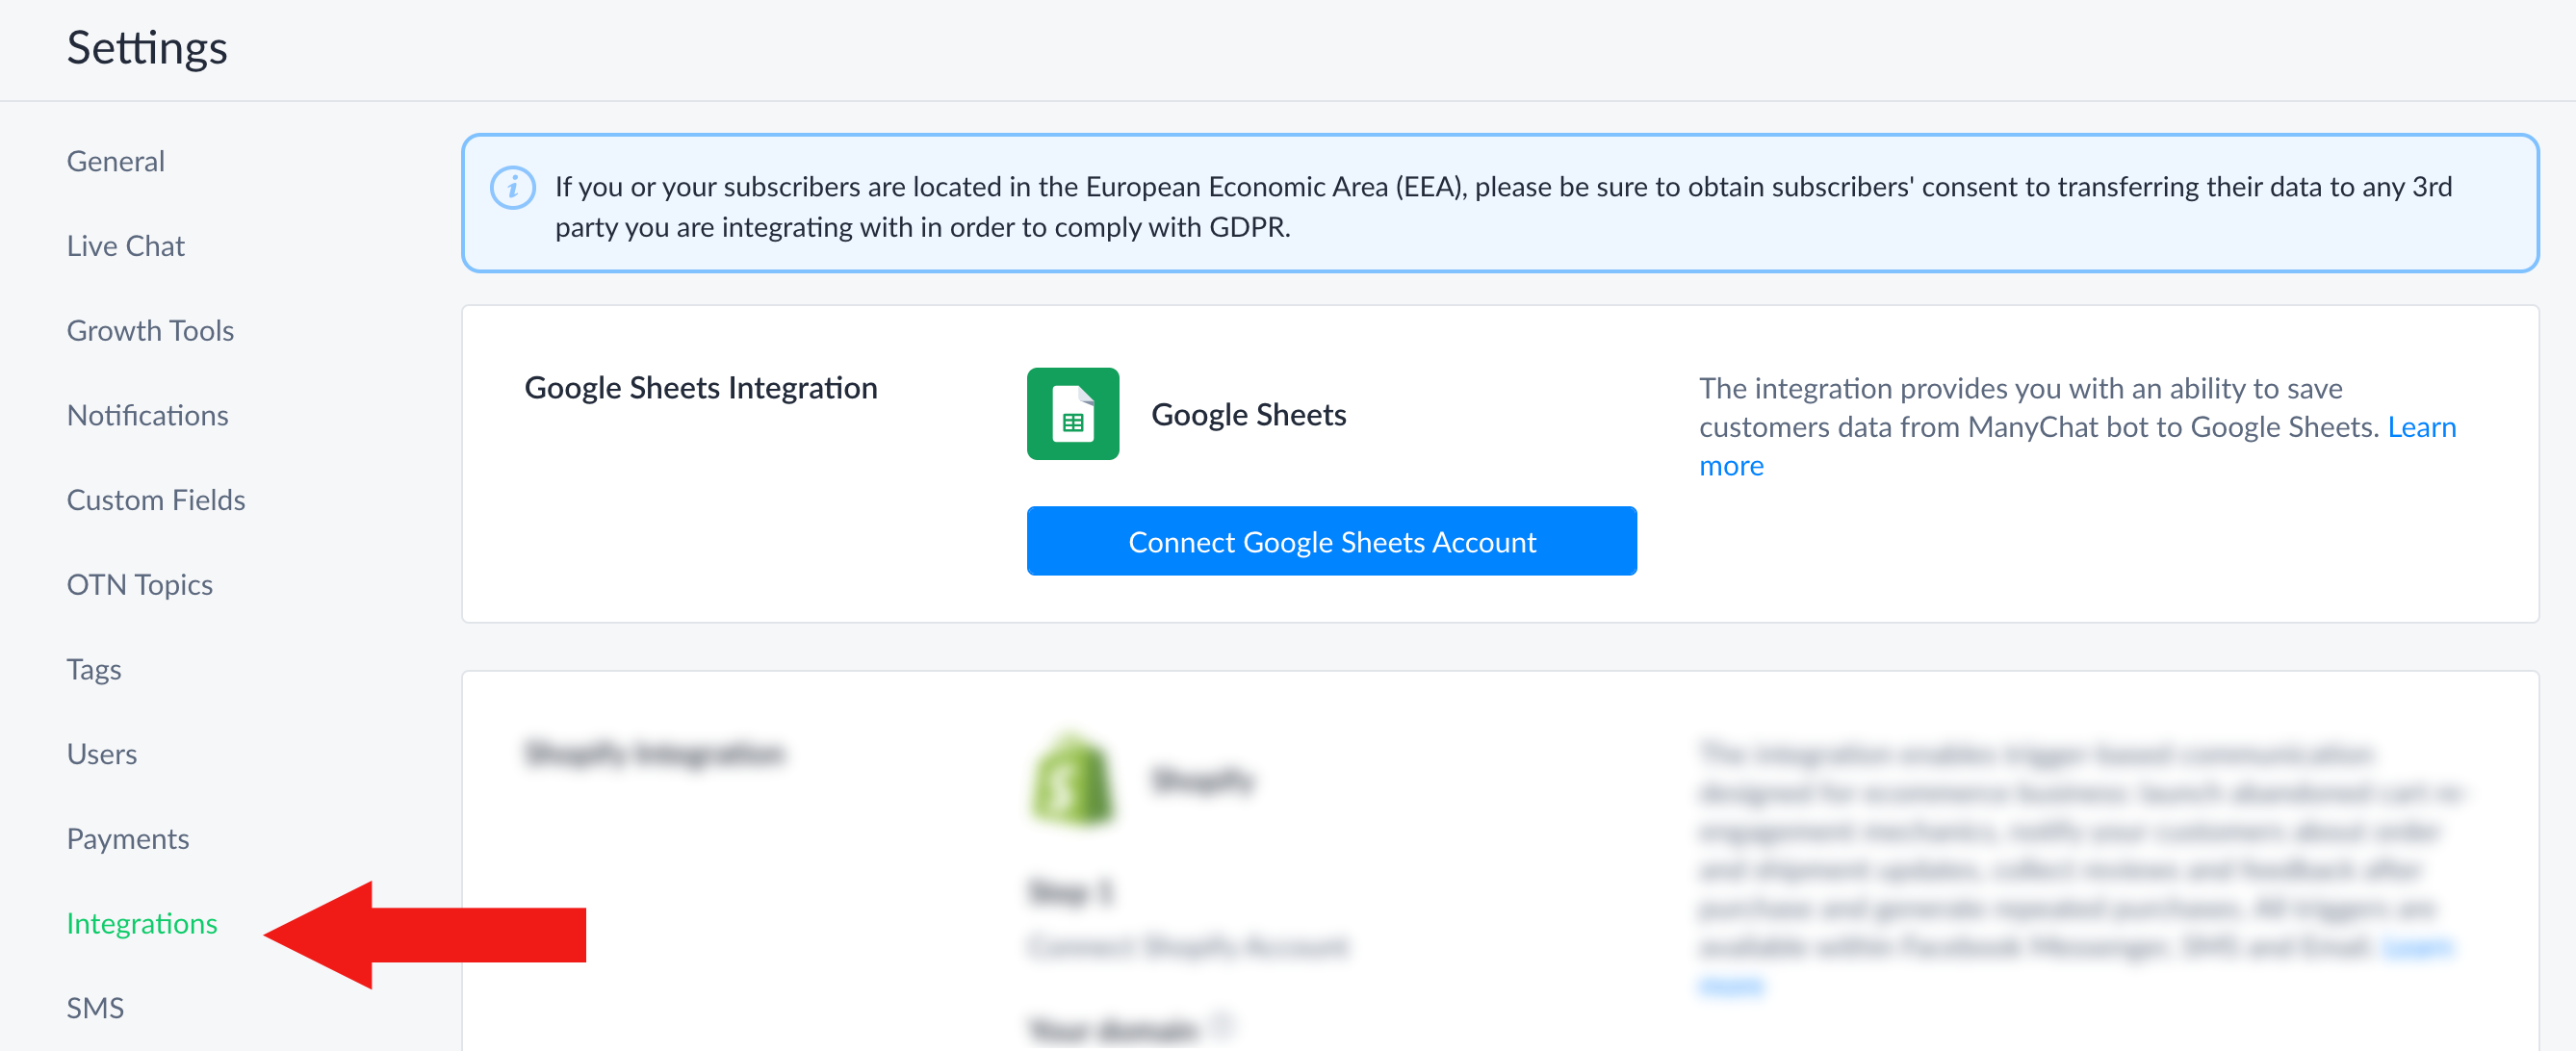
You can write data to our Google Sheet template for galleries by using the Manychat native Google Sheets integration and setting custom user fields. You'll want to add an action in your flow that sets these fields and then continue with another action to insert a row into the Google Sheets template. The shopping cart example used in our Ecommerce Native Toolkit for Messenger provides a good example, and we've included sample flows with these actions built-in. The first step is to connect your Manychat bot to Google Sheets by going to Settings.
You'll need to set up a few custom user fields, or just install the Botsheets eCommerce template if you don't want to set these up manually.
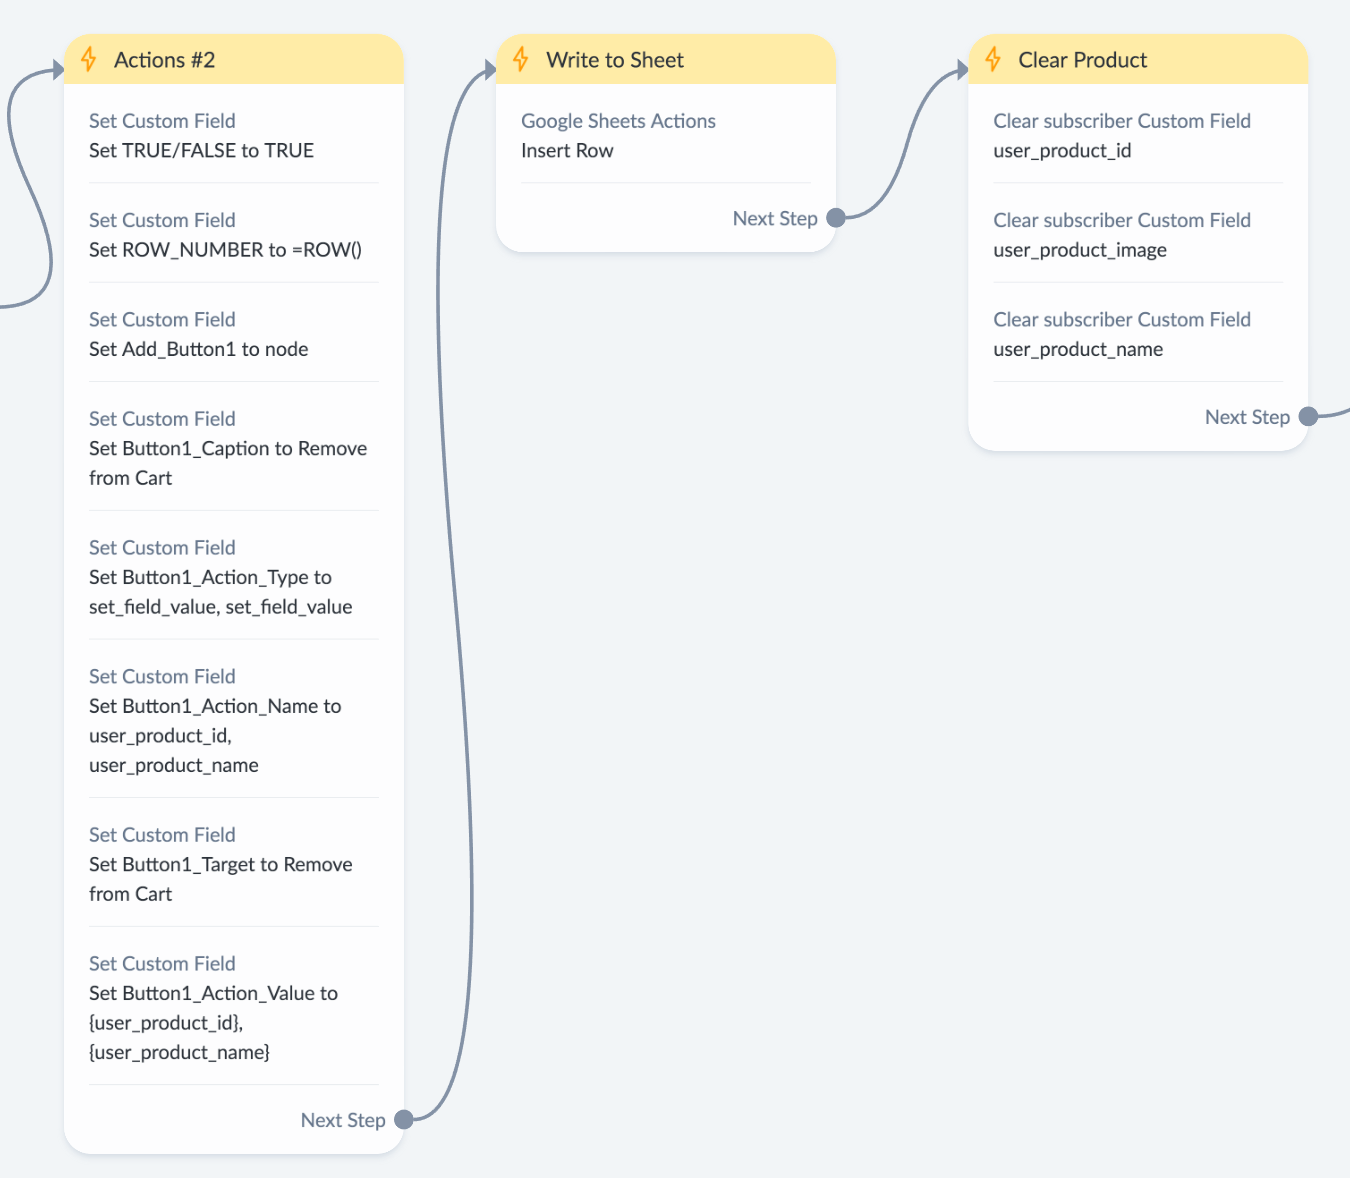
The following are typical fields that should be set to insert a row into a gallery Google Sheets template:
Typical Fields for Inserting a Row into a Gallery Google Sheets Template
| Field | Description |
|---|---|
| TRUE/FALSE | This will control the active status in the sheet so an item will either be active in a gallery or not. Set a text-based custom field to TRUE or FALSE. |
| row_number | You'll want to have a column header "ROW_NUMBER" and give your rows in the sheet a number. Set this field to =ROW(). |
| Add_Button1 | Set this to be a text-based custom user field and use the label exactly as it appears in the Google Sheet pulldown. For example "node" is a button type. |
| Button1_Caption | Set a text-based custom user field that matches the label you want for this button. |
| Button1_Action_Type | If you want to set a custom field from the sheet, remove a custom user field, add or remove a tag, set the value based on the values that appear in the button action pulldown menu in the Google Sheet. |
| Button1_Action_Name | For the value, include the custom user field that you want to set, or the tag if you're setting a tag. |
| Button1_Target | For the value, include a value for what happens when the user clicks your button. It could be a phone number, a URL, or a flow ID, or a node. |
| Button1_Action_Value | Refer to the custom user field you want to update if you're adding an action to a button when it's clicked. |
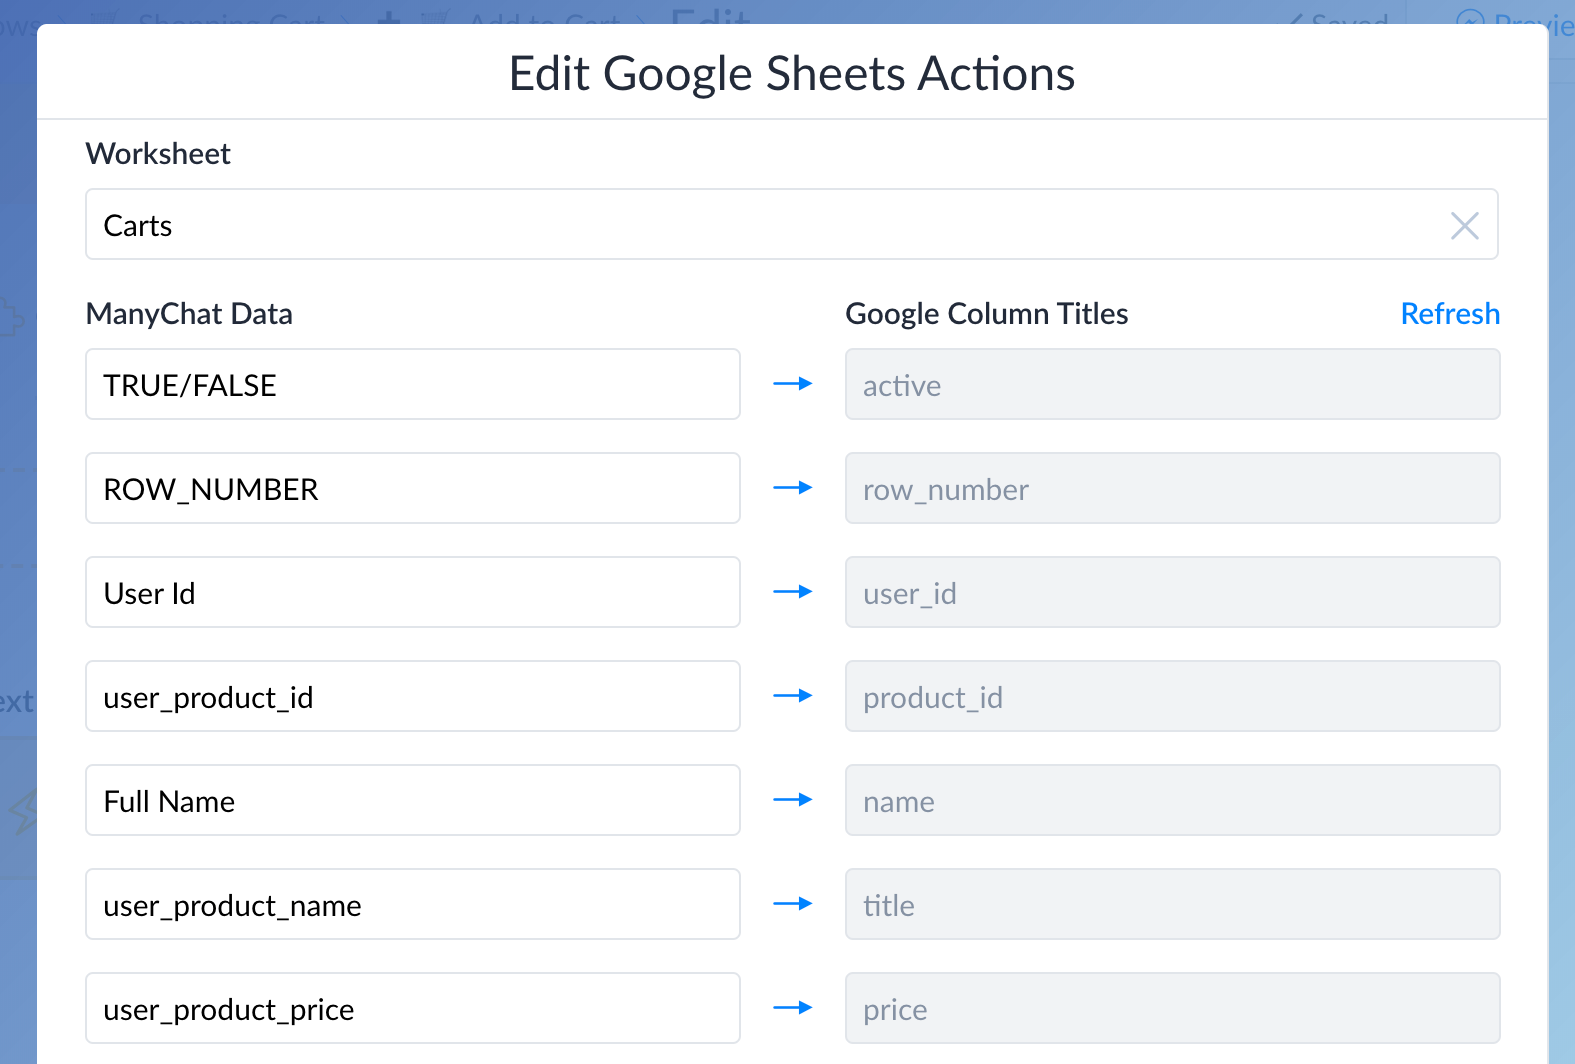
Insert Row
Now that your custom user fields are set, you can trigger the Manychat action to insert the row into the Google Sheet. You'll need to manually add each of the custom user fields from the template to their corresponding Google Sheet column headers. Choose your Google Sheet and then choose the sheet tab name and map the custom user fields to your sheet column headers. You can see in this example we've mapped custom user fields for the ecommerce "carts" sheet with the custom user fields that match up with our column headers in that sheet.
Removing Rows
You can use Botsheets Actions to remove rows from your Google Sheet.
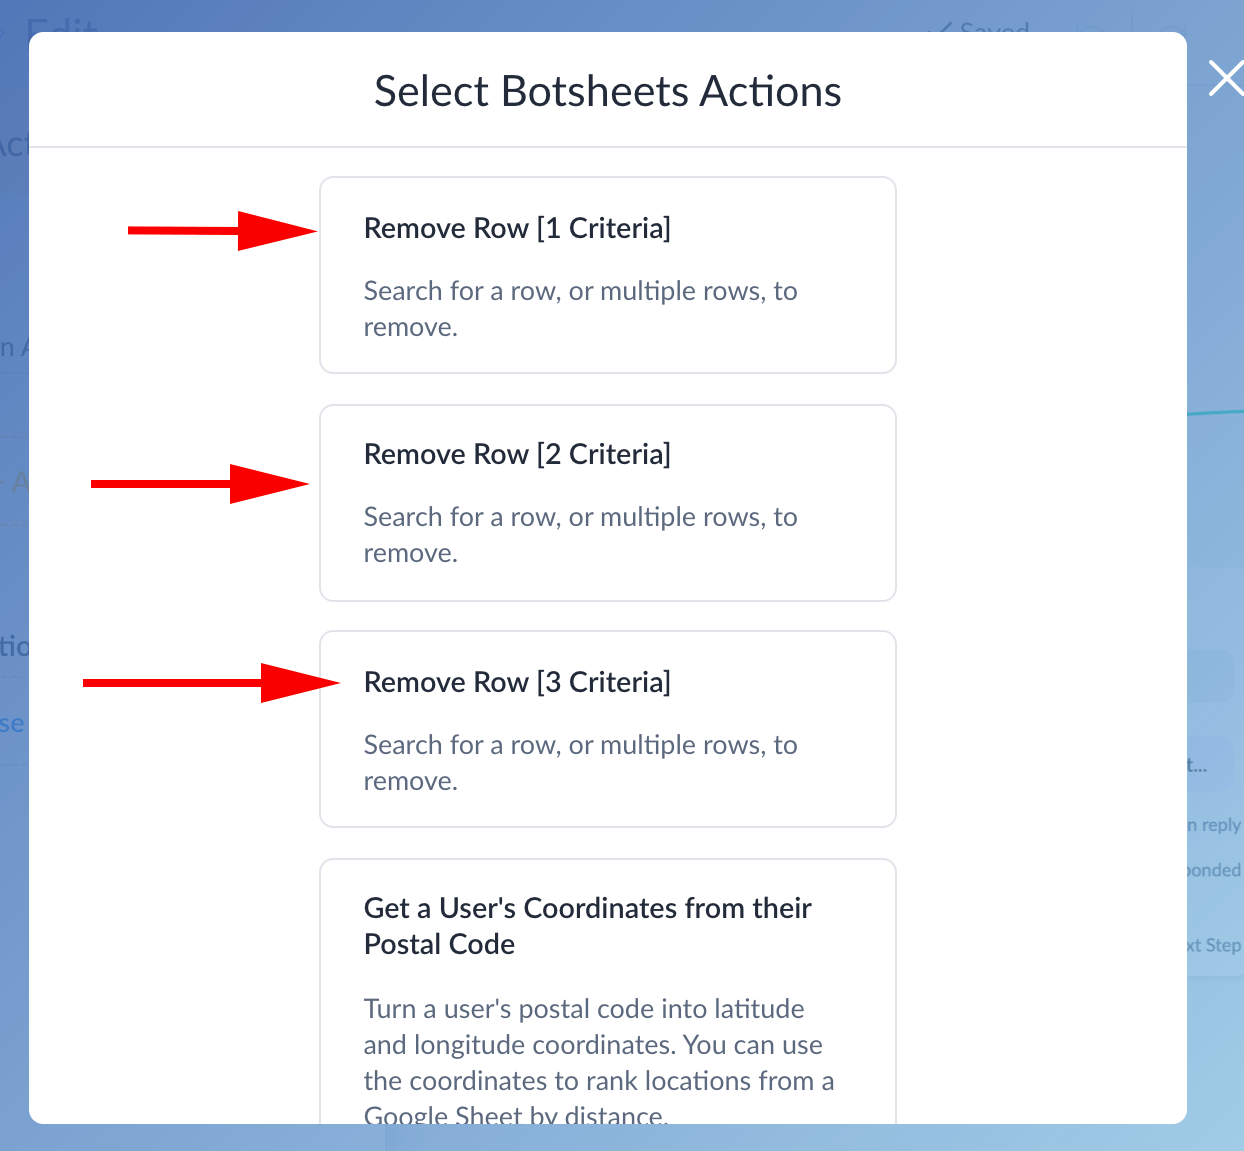
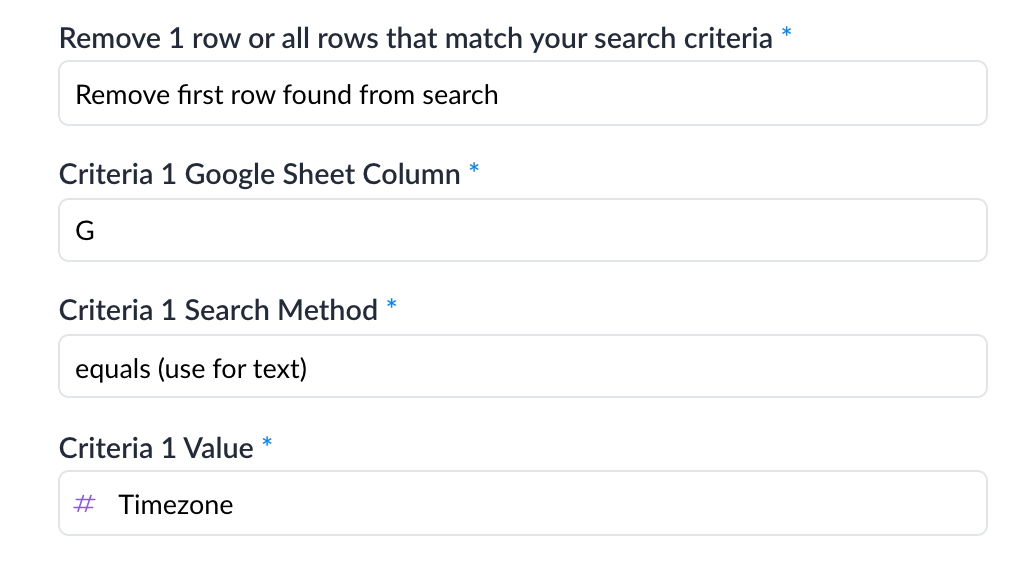
You can choose to remove the first row found, or any row that matches a value. You'll want your search method to be equals (use for text) and you can input a custom value to look for, or a user field with a stored value.
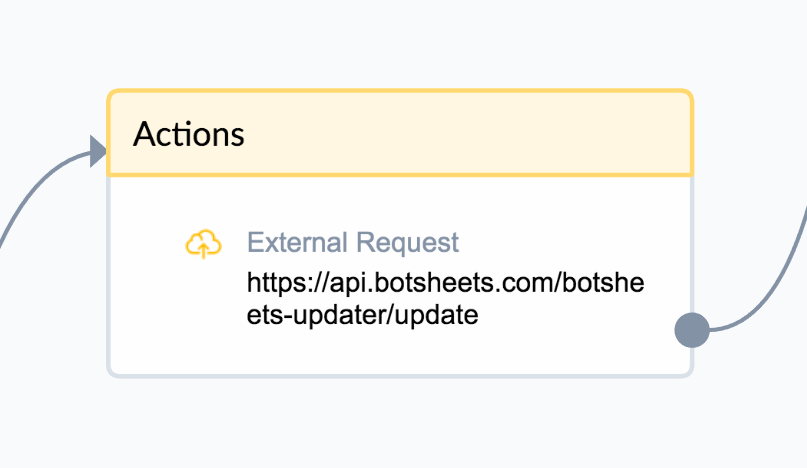
Edit Cells
With one external request you can search for a value in any row of a Google Sheet and update the cell to be any value you want. To update a cell in a Google Sheet, set an external request action with the following URL: https://api.botsheets.com/botsheets-updater/update
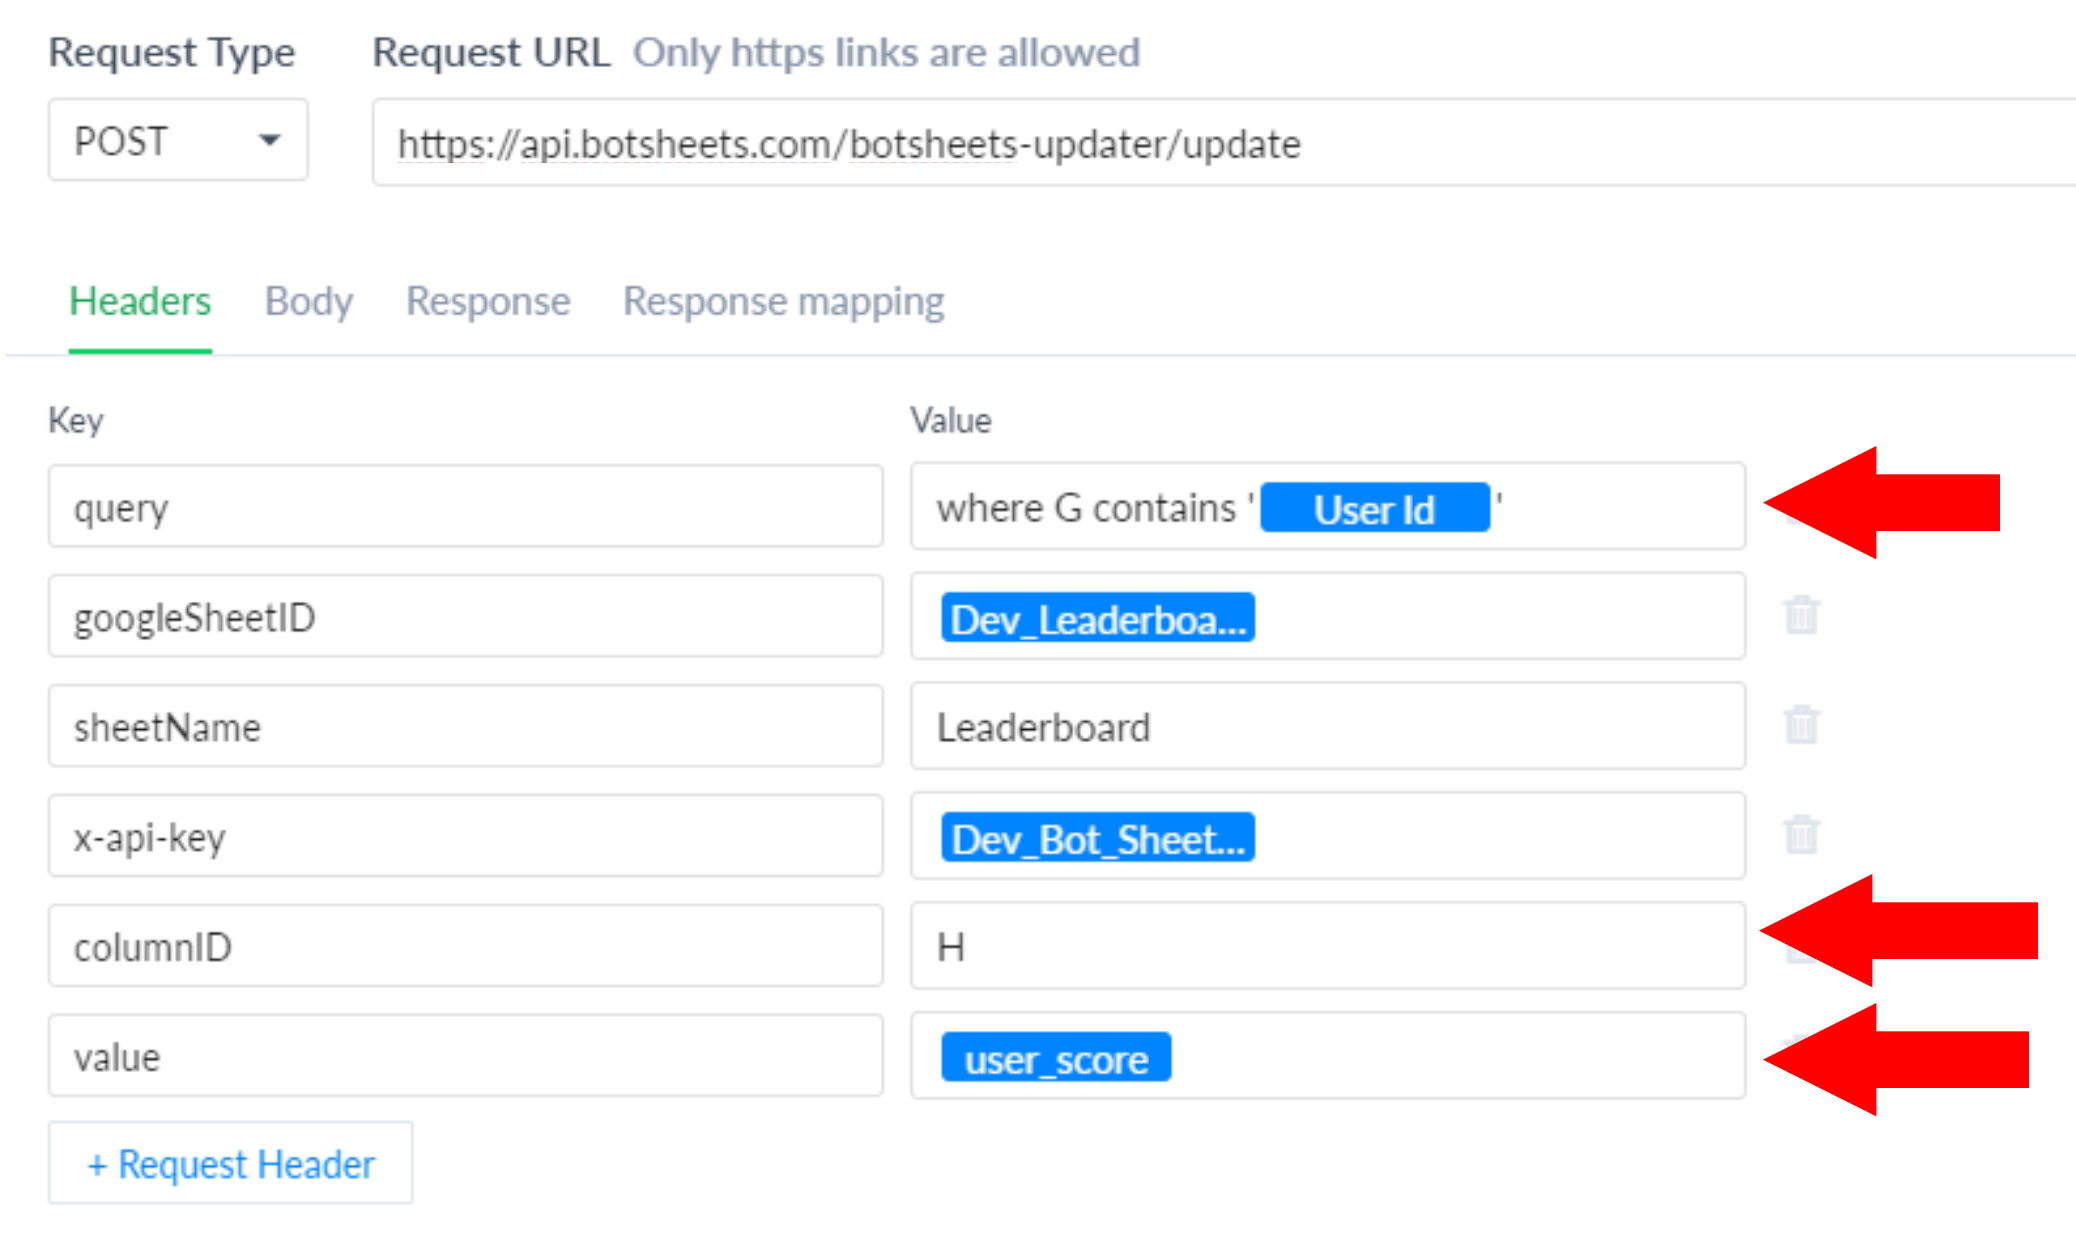
In the exeternal request, you can query the sheet for the row where you'll want to update a value by adding a query. You'll also need a column ID, and a value.
| Parameter | Description |
|---|---|
| query | Create a query of the Google Sheet and using any of the standard Botsheets queries. |
| columnID | You need to reference a column using columnID as the key and the column letter as the value (For example, A, B, C, or D, etc..). |
| value | The value that the cell should be updated to. It could be a value you manually input into the request, or update the value dynamically using a custom user field. |